
Interface and Navigation
Main window layout
The main window is divided into four practical areas:
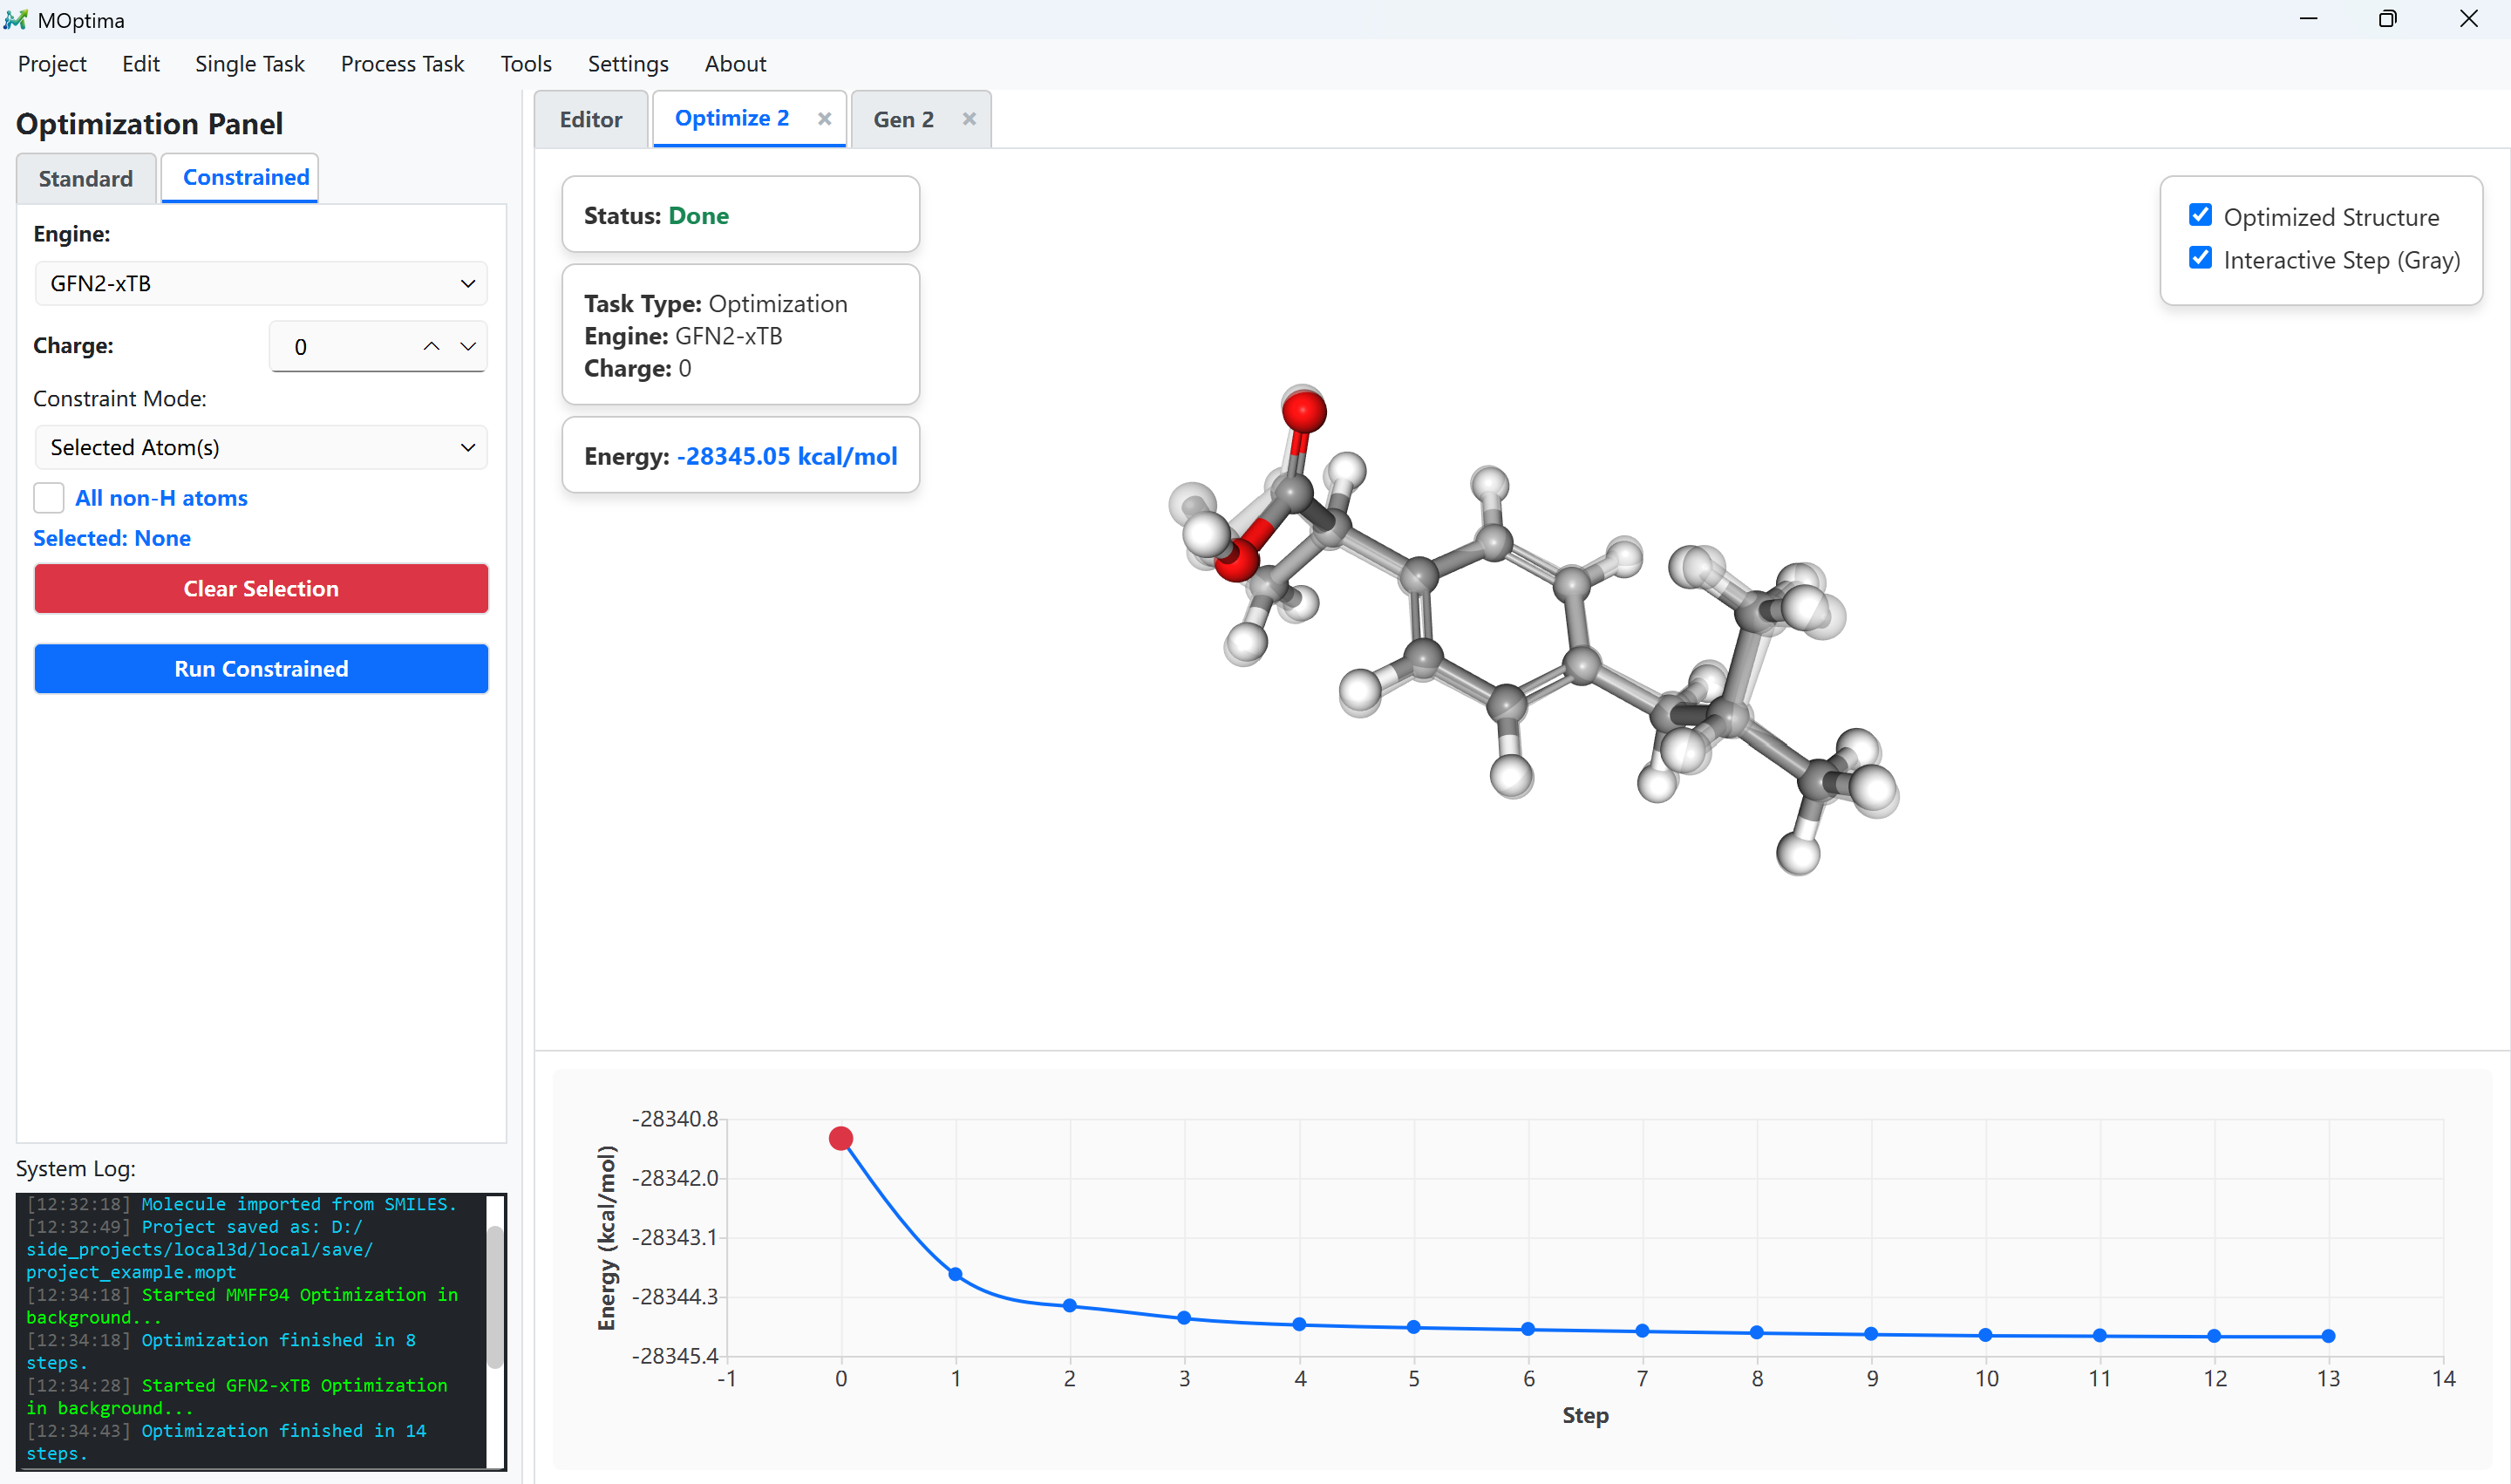
1. Menu bar
The top menu bar is the fastest way to reach high-level actions. The main menus are:
ProjectEditSingle TaskProcess TaskToolsSettingsbuttonAbout
Use the menu bar when you want to start a new action from scratch, especially project management, import, and task entry points.
The Tools menu includes Molecular Orbital Viewer.... It opens a separate, modeless window for the structure in the active tab. The viewer uses xTB, displays the molecular-orbital surface alongside its energy-level diagram, and does not replace or modify the active MOptima tab.
2. Left sidebar
The left sidebar changes according to the active workflow. It contains task-specific controls such as:
- Edit mode selection.
- Parameter fields.
- Apply or run buttons.
- Clear-selection controls.
- Progress-related controls for some workflows.
The sidebar is the main place where you tell MOptima what you want to do with the current structure.
3. Central 3D viewer
The center of the window contains the molecule viewer. This is where you:
- Inspect geometry.
- Pick atoms.
- Rotate, pan, and zoom.
- Preview task results.
- Compare optimization states and scan structures.
The viewer is interactive, and atom clicks in the Editor tab always update one shared selection. Editing, constrained optimization, and PES scans use that selection when their atom counts are valid. The selection toolbar sits above the viewer and works across sidebar panels.
4. Tab area
The main tab bar starts with the Editor and grows as you run tasks. New calculation results are opened as additional tabs so you can compare steps without replacing the current editor state.
QM-related content is grouped in a container-style tab so multiple QM jobs can stay organized inside one section. Energy curves beneath result viewers show relative energy: the lowest plotted point is 0 kcal/mol. Energy ticks and point tooltips use two significant digits without an extra axis multiplier; point tooltips also show the absolute energy.
Typical navigation pattern
Most operations follow the same pattern:
- Choose the task from the menu or switch to the matching panel.
- Use the viewer to select atoms if the task requires geometry targets.
- Set parameters in the left panel.
- Click the run or apply button.
- Read the generated result tab.
Result tabs vs Editor tab
Use the Editor tab when you want to change the working structure. Use result tabs when you want to inspect calculation outputs without overwriting the current editor state immediately.
This distinction matters because MOptima is built to preserve workflow history. A result tab is not just a picture of the molecule; it is a step in the project record.
Settings and Themes
Click Settings to open the settings dialog. The General tab contains Appearance (Light(Default) or Dark), Compute (CPU count), and Operation. The Operation switch allows touchpad or mouse-wheel scrolling over numeric inputs and closed dropdowns to change their values. It is off by default, so scrolling over those controls scrolls the containing panel when possible. An open dropdown list remains scrollable. The Advanced tab lists separate native constraint force constants for each engine, calculation stage, and distance/angle/torsion mode.
Click Apply to save changes while keeping Settings open, OK to save and close, or Cancel to close without saving changes made since the last Apply.
The theme change affects the main window, menu styling, sidebar panels, tabs, and the integrated 3D viewer. If you change themes while working, review the viewer contrast and panel readability before continuing a detailed selection step.
Batch Mode
MOptima also supports Batch Mode for multi-structure input. The interface behavior changes when Batch Mode is active, so read Batch Mode before running multi-molecule workflows.